 CLASHBASE.ONLINEClan War
About this Town Hall 15 base
Copy this base to Clash of Clans
Tap the button below. Clash of Clans will open so you can place this layout in an available base slot.
Copy base to the gameClash of Clans must be installed on this device.Rate this layout
Share a useful, honest experience. One review is stored per visitor for this item.
TH15 Clan War Base #30: Offset-Ring Defense with Lower-Left Pressure
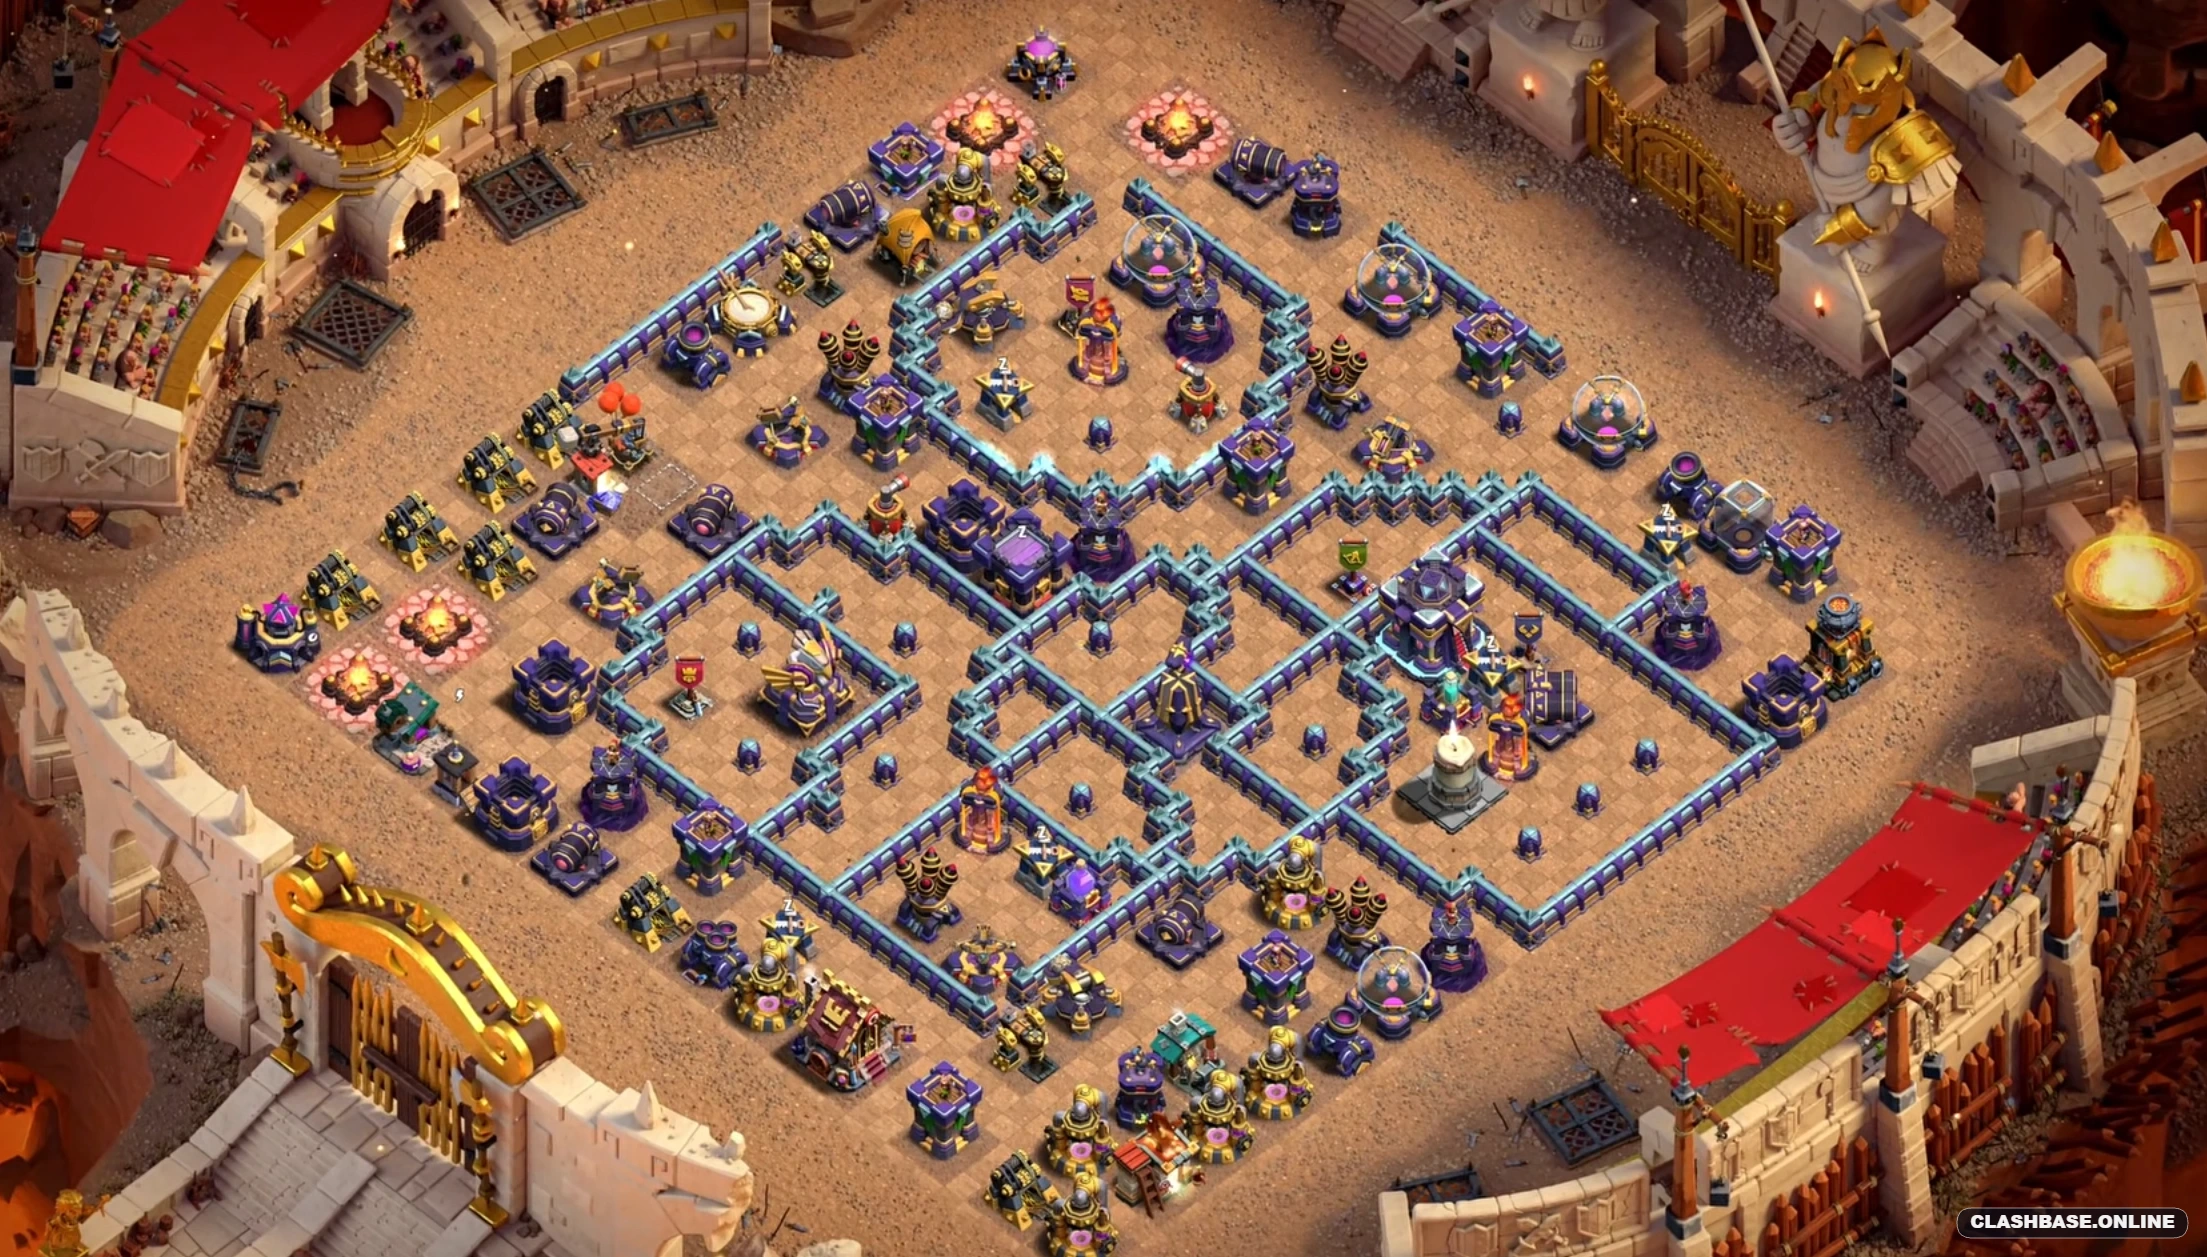
Town Hall 15 Clan War Layout #30 is built around an offset-ring structure that makes the attack feel simpler from the outside than it actually is once troops reach the middle. The Town Hall is pushed slightly toward the left side instead of sharing one perfectly central compartment with every other high-value defense. Around it, the walls create several connected sections that can send troops inward, sideways, or around the ring depending on how the funnel is shaped.
That is probably the most important thing to understand about this base.
It does not seem designed around making the Town Hall impossible to reach. A well-planned TH15 army can certainly get there. The more interesting defensive idea is what happens immediately afterward. The safest Town Hall route may consume troops and spells that the attacker would rather save for the back end, while a more aggressive three-star plan has to accept additional risk around the main objective.
In Clan War, that is a useful tradeoff.
The Town Hall is only the first problem
Because the Town Hall sits slightly left of the main defensive center, an attacker may be tempted to isolate it early. On paper, that sounds sensible: secure the objective, protect the two-star result, then use the remaining army to finish the rest.
The problem is that the Town Hall route does not appear to remove every important defense along the way.
Several high-value targets sit on different branches of the ring. If the attacker commits too much to the Town Hall compartment, the army can leave that area with fewer spells, weaker heroes, or awkward pathing toward the opposite side.
I would not call that a flaw in the design. It actually appears deliberate.
A good anti-three-star base does not always need to stop the Town Hall takedown. Sometimes giving the attacker a believable objective route while making the remaining 30 or 40 percent uncomfortable is the better defensive idea.
Why the lower-left side stands out
The lower-left edge, roughly around seven or eight o’clock, looks like the first place I would scout.
There are enough outside buildings to establish a funnel without committing the entire army immediately. More importantly, that side provides a fairly natural angle toward the offset Town Hall and the inner ring.
A Queen Charge could start there. A few funnel troops could also clear the outer structures before Root Riders or another heavy ground force enters.
Still, the opening needs to stay controlled.
Clear too much of the lower-left side and several compartments become available at once. The main army may head toward the Town Hall while the Queen or supporting troops continue around the outside. For the first twenty seconds, that can actually look excellent. Percentage rises quickly and multiple buildings fall.
Then the core phase begins.
Now the army is spread across two different fights.
A Rage, Heal, Freeze, Overgrowth, or another support spell that could have strengthened one large push may only cover half of it. That does not always destroy the raid, but it can make the second half noticeably less efficient.
Cutting the ring early is the main weakness
The clearest weakness I see is a controlled lower-left entry that cuts through the ring beside the offset Town Hall before the main troops begin circling.
If the attacker removes the correct buildings and creates one narrow route inward, a lot of the layout's pathing uncertainty disappears.
Instead of letting the ring decide troop movement, the attacker decides it in advance.
That could be particularly effective with Root Riders or another heavy ground smash army. These troops are comfortable crossing walls, so the compartments themselves are unlikely to stop them for very long.
The real defensive question is whether the base can separate the front line from the heroes and support behind it.
If Root Riders, heroes, healers, and supporting troops stay together, the attacker gets far better spell value through the core.
If part of that formation moves around the ring, the same army becomes much less efficient even though plenty of troops may still be alive.
That is a subtle but important difference.
Queen Charge Hybrid could offer the most control
Queen Charge Hybrid looks like one of the cleaner counters because it lets the attacker shape the base before committing the main force.
A Queen starting from the lower-left could remove one defensive pocket, clear buildings that might otherwise drag Miners and Hog Riders around the ring, and create a more predictable lane toward the Town Hall.
If she follows the intended path, the Hybrid phase could enter with much better control than a straight spam attack.
The downside is time.
One unexpected Queen walk can add several seconds to the opening. A high-hitpoint building or awkward wall opening can do the same. None of those problems necessarily ruins the attack immediately, but they can make the final phase much tighter.
The Town Hall may still fall.
The percentage may still look good.
Yet the last defensive section can survive simply because the remaining troops have too much distance to cover.
In war, that is often enough to protect the third star.
Heavy ground attacks need a clean exit, not just a clean entry
Root Rider or heavy ground smash armies are likely to create strong pressure through the core, but I would pay just as much attention to where those troops exit after the Town Hall phase.
A clean entry is only half the attack.
Suppose the main group reaches the objective with heroes healthy and good spell support. Everything looks under control. Then the Town Hall goes down and one part of the army turns toward the upper side while another group moves across the ring.
Suddenly the attack is fragmented.
The surviving troops may still be strong enough to clear both sections eventually, but the timer becomes part of the defense.
That is where Layout #30 may get a lot of its value. It does not necessarily stop the first push. It tries to make the transition after that push awkward.
Dragons and LavaLoon have options too
The Air Defenses appear spread across different approach lanes rather than stacked into one convenient defensive pocket. The Inferno Towers are also separated, which makes it harder to solve every important threat with one spell sequence.
Dragons could still be effective, especially after shaping the lower-left funnel.
I would expect a relatively narrow deployment to perform better than a full-width line. Spread the Dragons too broadly and several may follow exterior buildings while the stronger group heads toward the Town Hall.
That creates nice early percentage, but it can weaken the central push.
LavaLoon offers more precise target control, though the attack needs to be planned beyond the first Air Defense.
Removing one air threat does not automatically open the rest of the village. The attacker still has to plan the Town Hall phase, surviving Inferno coverage, and whichever defensive section becomes the back end.
A strong opening is useful. A strong transition is more important.
Why Layout #30 fits Clan War
The strongest Clan War feature here is the tension between securing the Town Hall and preserving enough force for three stars.
A cautious attacker can build around the objective and probably create a safer two-star plan. The downside is potentially overspending before reaching the remaining defenses.
A more ambitious attacker can preserve troops and spells for the back end, but that naturally makes the Town Hall phase less comfortable.
Neither approach looks completely free.
That is exactly the kind of decision a war base should create.
Layout #30 also rewards proper scouting. Knowing that the lower-left is the easiest funnel is useful, but it is not enough. The attacker still needs to answer a second question:
Where should the army go after the Town Hall falls?
That may decide the raid more than the first wall break.
Overall assessment
TH15 Clan War Layout #30 appears to be an offset-ring anti-three-star base built around Town Hall separation, troop pathing, and difficult back-end transitions.
Its clearest weakness is the lower-left side. A disciplined Queen Charge Hybrid, compact Root Rider smash, Dragon push, or carefully sequenced LavaLoon attack could cut the ring early and make the route considerably easier to control.