 CLASHBASE.ONLINEFarming
About this Town Hall 16 base
Copy this base to Clash of Clans
Tap the button below. Clash of Clans will open so you can place this layout in an available base slot.
Copy base to the gameClash of Clans must be installed on this device.Rate this layout
Share a useful, honest experience. One review is stored per visitor for this item.
TH16 Farming Base #5: Storage-Led Diamond with a Lower-Right Entry
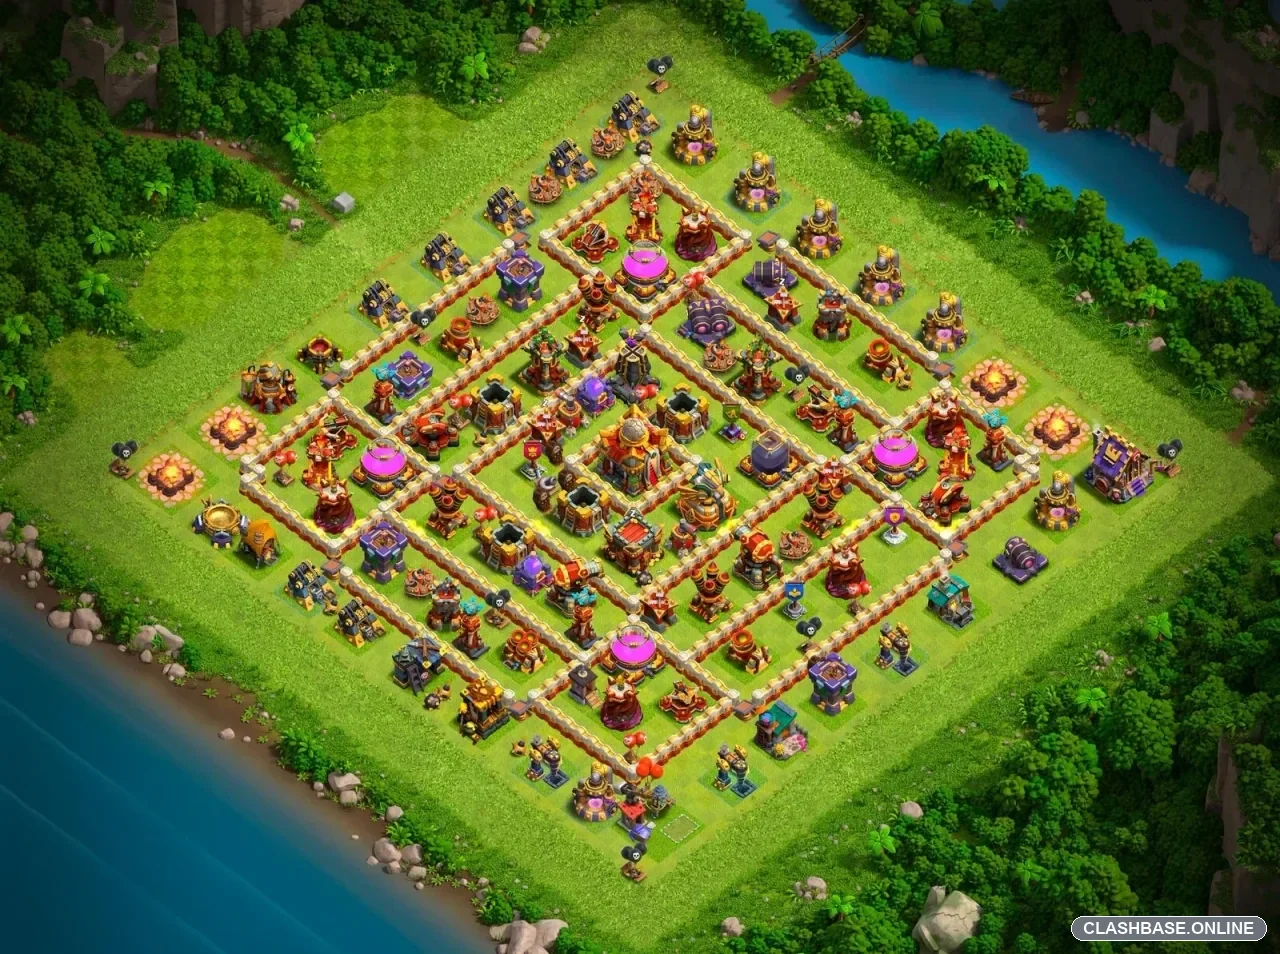
Town Hall 16 Farming Layout #5 uses a storage-led diamond structure rather than hiding every resource inside one oversized central compartment. The Town Hall sits close to the middle of the village, behind the main storage line, while important defenses and resource buildings are distributed across several connected sections.
What stands out to me is that the layout does not appear to offer an attacker one obvious “loot highway.” You can probably reach one valuable section fairly quickly, but taking the next storage means crossing another layer, changing direction, or committing more of the army. For farming defense, that is a sensible approach. The layout does not have to keep every drop of loot untouched; it mainly needs to make a complete resource sweep noticeably harder than a quick raid.
The storage-led diamond changes the natural attack route
The walls create a diamond-like progression toward the core. Storages help anchor several of those compartments, which matters because they are not only valuable buildings—they also take time to destroy.
An attacker entering from one side may clear a storage and feel that the route toward the Town Hall is opening nicely. Then the path splits.
One part of the army may continue toward the center while heroes or supporting troops turn toward another nearby compartment. For a short period, this can look like excellent value. Buildings are falling on two sides, percentage is climbing, and the raid still feels controlled.
The cost usually becomes clearer later.
When the main force reaches the Town Hall area, some of its support may be several walls away. Rage, Heal, Freeze, Overgrowth, or another control spell that could have supported one concentrated group now helps only part of the attack.
That kind of separation is likely to matter more than the first wall break itself.
Why the lower-right edge is worth scouting first
The lower-right edge, roughly around four or five o’clock, looks like the most natural place to establish a funnel.
There is enough exterior value to clear without committing the entire army, and the wall geometry gives the attacker a diagonal route toward the middle. A Queen Charge could begin there, or a few funnel troops could trim the side before a larger ground army enters.
Still, I would avoid clearing the entire corner too early.
A wide opening can expose several targets at once. Root Riders might head toward the core while the Queen remains on the outer lane. Dragons could split in a similar way, with some units moving inward and others continuing around the perimeter.
The attack may still be alive, but it becomes less efficient.
A tight lower-right funnel would concern me much more as the defender because it allows the attacker to control the diagonal instead of letting the layout dictate troop movement.
The main weakness: an exposed diagonal storage lane
The clearest weakness in Layout #5 is a controlled diagonal push that turns one exposed storage lane into direct access toward the center.
If an attacker removes the correct lower-right buildings, the route may become considerably shorter than the layout intends. Instead of working through several storage sections in sequence, the main group can potentially cut inward and reach higher-value defenses faster.
Queen Charge Hybrid looks like one of the cleaner ways to exploit that.
A Queen could start from the lower-right, remove one defensive compartment, and eliminate the buildings most likely to disturb the funnel. Once the route is shaped, Miners and Hog Riders would have a more predictable line toward the Town Hall.
The weakness of that plan is not necessarily damage. It is time.
A Queen who takes one unexpected turn can easily add several seconds to the setup. Storages and other high-hitpoint buildings can slow the charge as well. The Town Hall may still fall, but the final resource section could be sitting on the opposite side of the base when the attacker starts running out of time.
That is useful for farming defense. The defender does not need the entire attacking army to die if one major storage survives because cleanup never reaches it.
Root Riders and heavy ground smash armies
Root Riders or another heavy ground smash composition are also logical counters.
These armies are well suited to layouts with several wall compartments because they do not depend as heavily on opening one perfect route. Once the lower-right funnel is established, a compact ground push could move through the diamond fairly quickly.
The word compact matters here.
If Root Riders, heroes, healers, and support troops remain together, the attacker can get strong value from spells and hero abilities around the central defenses.
If the Queen drifts outside or part of the army chooses another storage lane, the same composition becomes noticeably less efficient. One group is fighting near the Town Hall while another spends time clearing a side section.
That is probably the defensive purpose of the storage-led shape: not to make the walls impossible to cross, but to encourage the army to cross them in the wrong order.
Air approaches have several possible routes
The Air Defenses appear positioned to cover different crossing lanes rather than being grouped tightly on one side. The Inferno Towers are also separated enough to behave like individual inner threats.
That means an air attacker has choices, but no single obvious route seems to solve the entire village.
Dragons could probably attack from the lower-right once the funnel is prepared. I would expect a tighter deployment to work better than a broad line. Spread the Dragons too far and some may follow exterior structures while the stronger group moves toward the core.
By the time that main group reaches the Town Hall, it may have less damage than the attacker expected.
LavaLoon offers better control over target order, but the raid still needs to be planned in stages. Removing the first Air Defense is only one part of the job. The Balloons still need a useful route through the storage-led center, enough support to handle the remaining Inferno pressure, and a finish that places them near the final resource pocket.
That last transition can easily become the difference between “good loot” and a complete sweep.
Why Layout #5 makes sense as a Farming base
The farming identity of this layout comes from the way resource access is broken into stages.
An attacker may take one storage fairly early.
The second requires another commitment.
A third could sit across the diamond, forcing the surviving army to change direction again.
By that point, some spells may already be used, hero abilities may be gone, and cleanup time begins to matter.
That is a more realistic defensive goal than claiming the base is impossible to clear. Against a strong, well-planned TH16 army, any visible farming layout can be broken. The useful question is whether a rushed raid can take everything without careful planning.
Here, that does not appear guaranteed.
The lower-right diagonal is the first weakness I would test. If an experienced attacker creates a disciplined funnel and keeps the main army together, the central section may open faster than intended. Queen Charge Hybrid, Root Riders, Dragons, and LavaLoon all look like plausible approaches.
But a rushed player using the same entry could get a completely different result. The army may split, spells may be spent early, and one of the remaining storages can survive simply because the attack finishes in the wrong part of the village.