 CLASHBASE.ONLINEFarming
About this Town Hall 17 base
Copy this base to Clash of Clans
Tap the button below. Clash of Clans will open so you can place this layout in an available base slot.
Copy base to the gameClash of Clans must be installed on this device.Rate this layout
Share a useful, honest experience. One review is stored per visitor for this item.
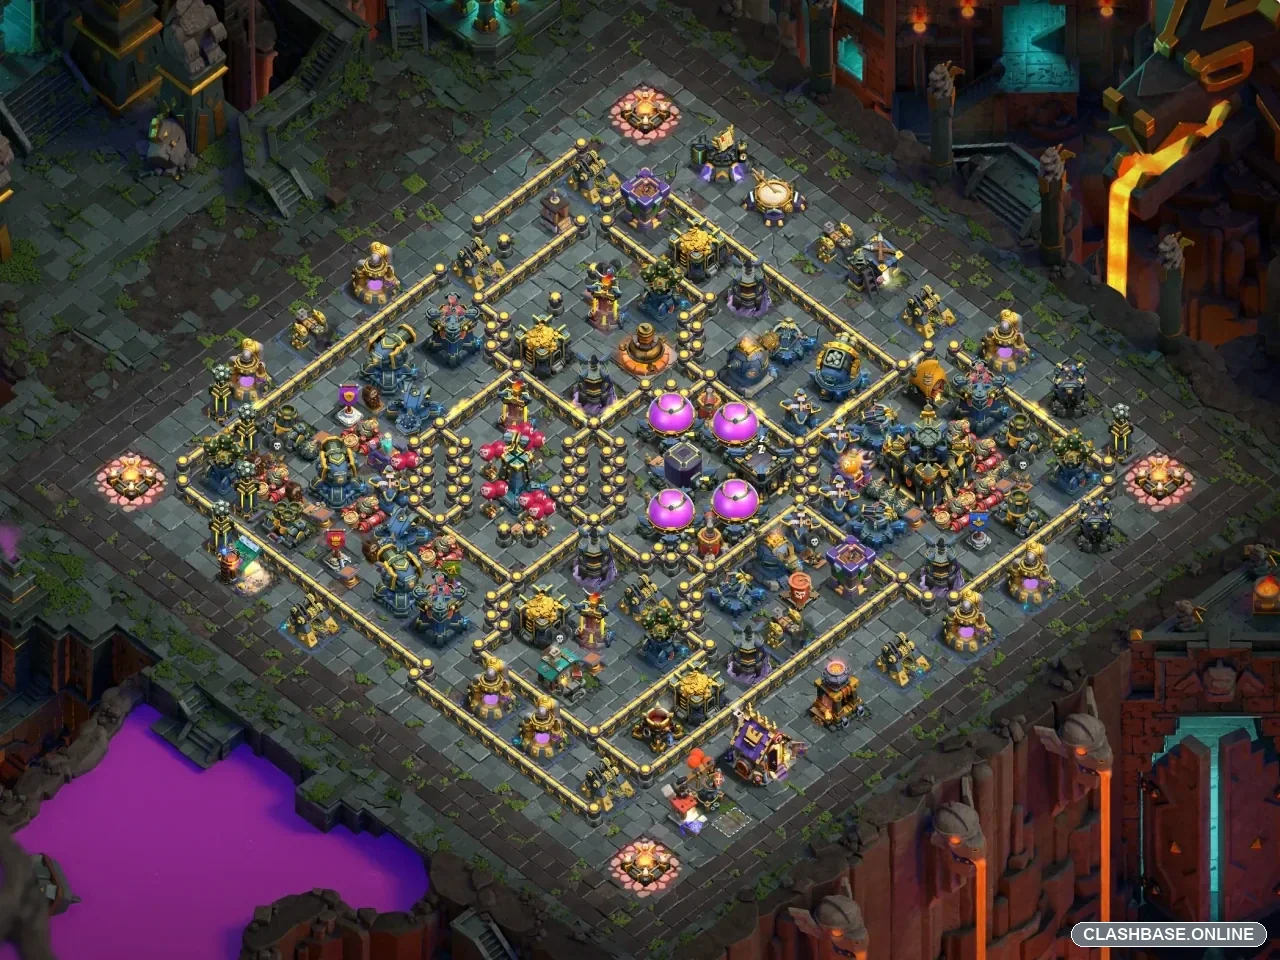
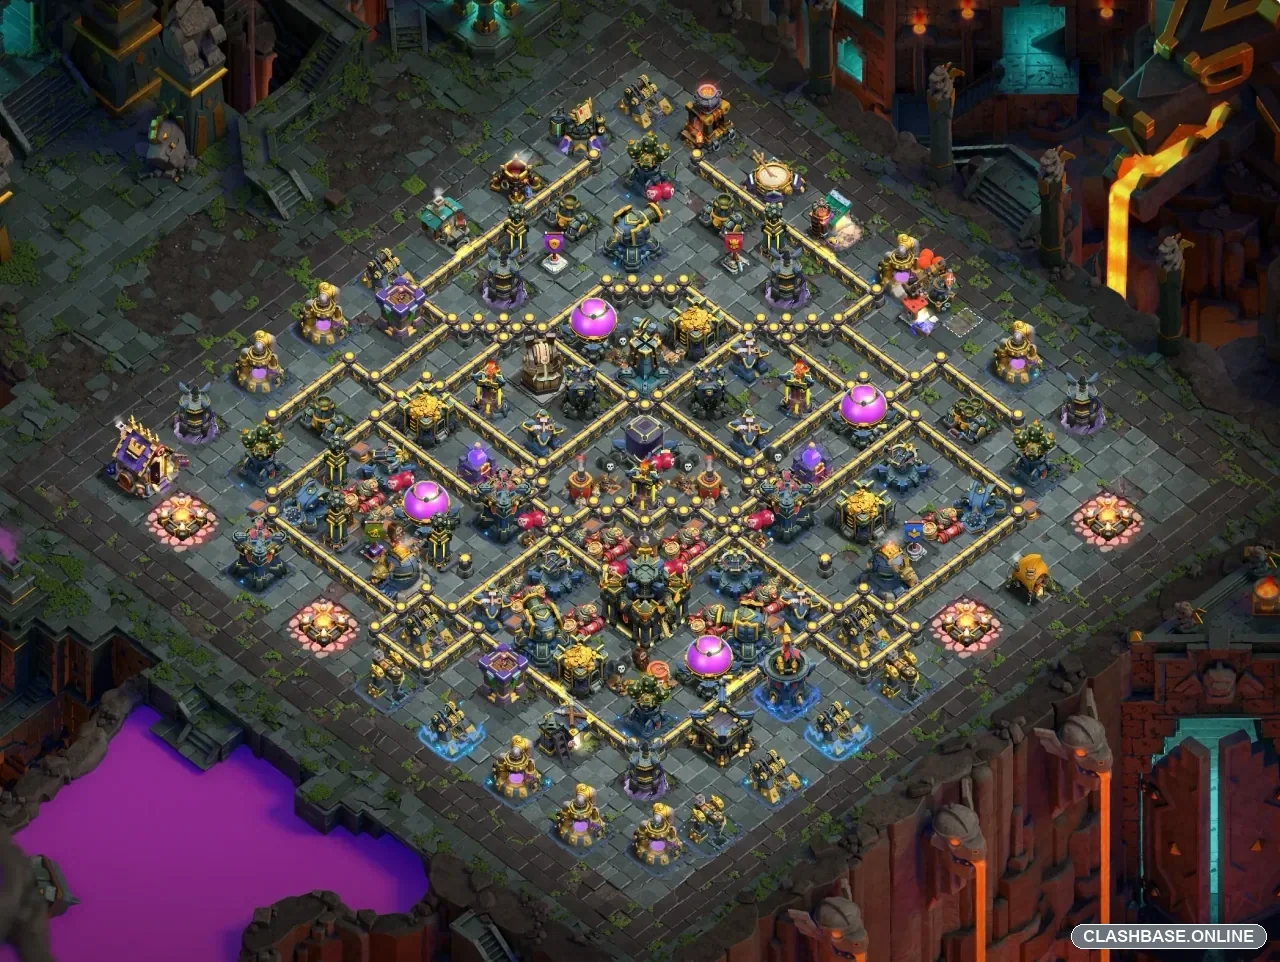
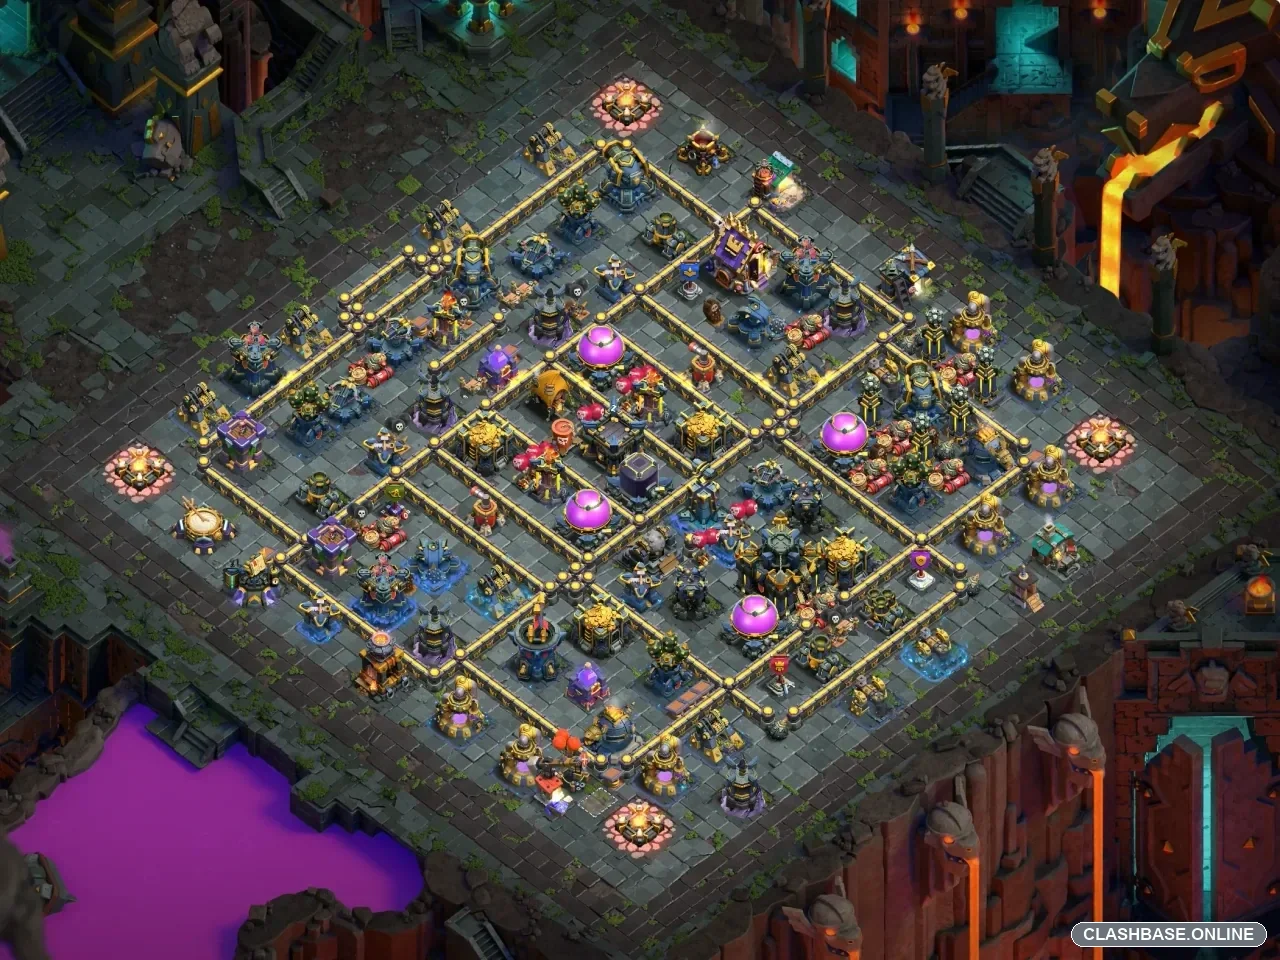
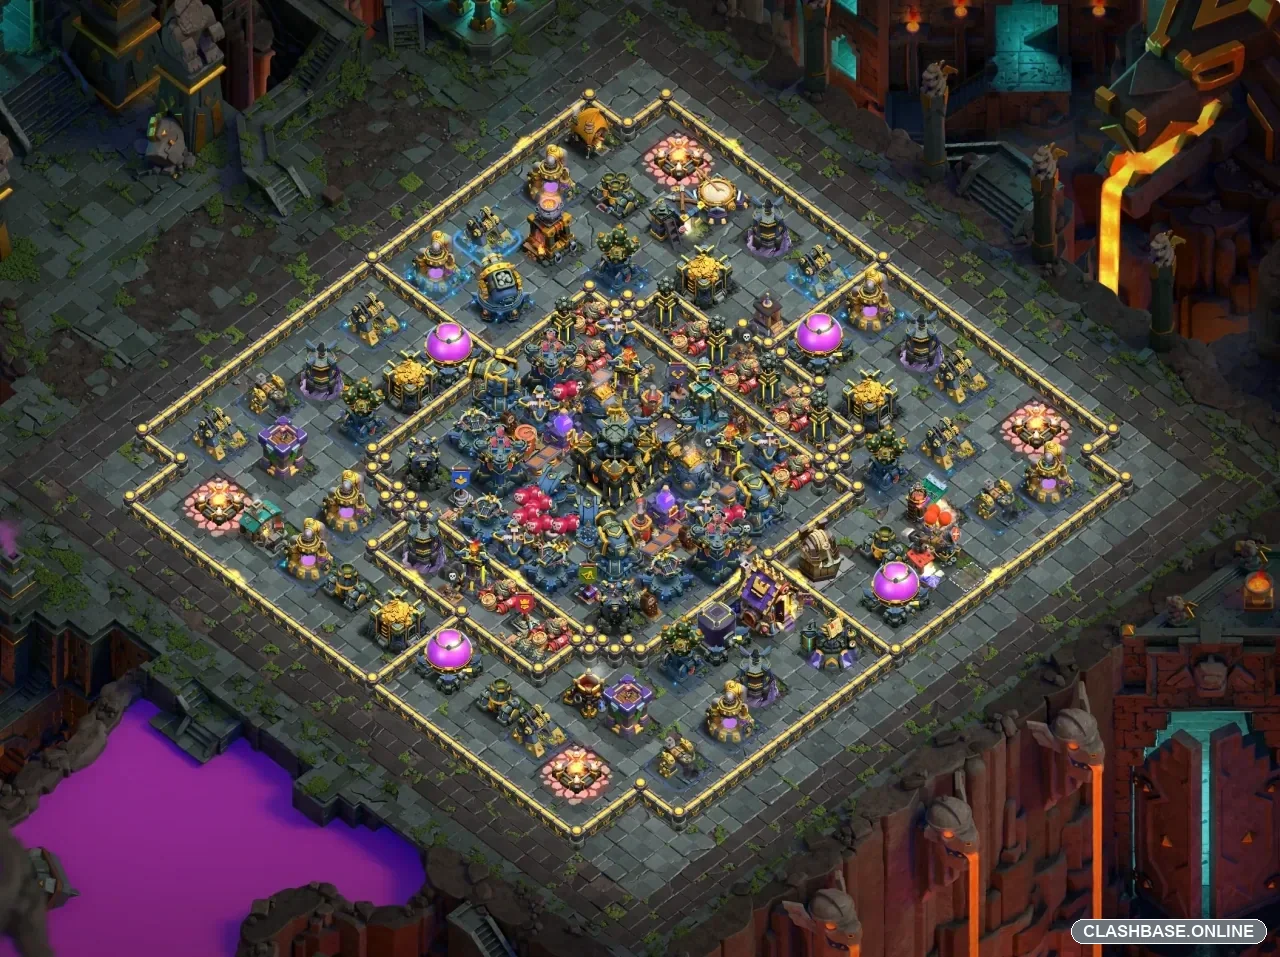
TH17 Farming Base #10: Layered Square with a Left-Side Funnel and Expensive Resource Path
Town Hall 17 Farming Layout #10 is built around a fairly dense resource core, but it does not simply throw every valuable building into one central box. The walls form several square layers, with the Town Hall sitting slightly above the visual center and the main storages spread through different compartments around it. That arrangement gives the base a clear farming purpose: an attacker may reach one valuable section without automatically gaining a clean route through everything else.
The outer shape looks straightforward, which can be a little misleading. Once the first layer is opened, there are several directions an army could follow. Some defensive buildings sit close enough to pull troops inward, while others encourage heroes or support units to continue around the perimeter. That difference in pathing is likely to matter more than the first wall break itself.
The left edge, around eight or nine o’clock, appears to be the most comfortable place to begin. There is enough space to remove a few outside buildings and build a controlled funnel before sending in the main army. I would not clear the whole side, though. A very wide opening could make the attack less predictable rather than more controlled.
The biggest visible weakness is a disciplined corner funnel that creates a straight path through two wall layers. If an attacker removes exactly the right buildings, the route toward the central storage area becomes much shorter. Root Riders or another heavy ground smash army could exploit that because the wall structure alone probably will not hold a strong TH17 push for very long.
The important part is keeping the formation together.
A compact Root Rider entry may carry the tanks, heroes, healers, and support troops through the same lane. In that situation, Rage, Heal, Freeze, or other control spells can support most of the army at once. That is where the layout seems most vulnerable.
A broader deployment produces a different result. Root Riders might head toward the Town Hall while the Queen keeps following buildings along the outside. For the first twenty seconds, that can actually look better because several sections are falling at the same time. Later, however, the main group may arrive at the central defenses without its full support. The attacker then has to spend spells fixing a pathing problem instead of using them where they were originally planned.
Queen Charge Hybrid also looks like a practical counter. Starting the Queen from the left could remove one defensive pocket and cut away buildings that might otherwise pull Miners and Hog Riders into the wrong compartment. If the Queen follows the intended path, the Hybrid portion should get a cleaner route into the middle.
The catch is time. A storage or defensive building that takes longer than expected may hold the Queen in place. One outside target can also encourage her to walk along the edge instead of entering the base. The attack may still collect strong percentage, but the opposite resource pocket can become difficult to reach before the timer runs out.
The Town Hall placement adds another interesting choice. Because it sits slightly toward the upper side, a player attacking from the left can reach the central section without necessarily passing through every storage. Going directly toward the Town Hall may therefore leave loot elsewhere. Taking a longer resource-focused route first can improve the amount collected, but it also spends more troops and time.
That is exactly the kind of tradeoff a farming base should try to create.
Air attacks have a different problem to solve. The Air Defenses and Inferno Towers do not appear to sit in one neat defensive cluster. Instead, they cover separate areas and different entry lanes. An air attacker may have to decide which section deserves spell support first rather than relying on one simple approach that removes everything important.
Dragons could potentially enter from the left after the funnel has been shaped. I would expect a relatively narrow deployment to be more reliable. Spread them across too much of the edge and a few Dragons may follow outside buildings while the strongest group goes toward the middle. Once that happens, the central push has fewer units available for the heavier defenses.
LavaLoon offers more control over individual targets, but the route still needs to be planned beyond the first Air Defense. Taking down one air threat does not seem to open the whole village. The attacker still has to choose how to cross the core, when to pressure the Town Hall, and which remaining compartment will become the back end.
What makes TH17 Farming Layout #10 convincing as a farming base is that each additional storage appears to cost something. The first resource pocket may be reachable without too much effort. The second asks for another wall transition. A third may force the army to turn across the core or travel toward the opposite side. By then, troops may already be split or cleanup may have started late.
That does not make the layout impossible to clear, nor should it be described that way. A well-prepared TH17 army can break through with good execution. The more useful question is whether a fast or careless raid can take the Town Hall and every major resource building in one comfortable push. Based on the visible structure, that does not look guaranteed.
The left-side funnel remains the area I would consider most vulnerable. A precise attacker who creates a straight line through two wall layers could expose the core earlier than intended. Still, doing that requires more discipline than simply dropping the whole army across one edge.