 CLASHBASE.ONLINEFarming
About this Town Hall 9 base
Copy this base to Clash of Clans
Tap the button below. Clash of Clans will open so you can place this layout in an available base slot.
Copy base to the gameClash of Clans must be installed on this device.Rate this layout
Share a useful, honest experience. One review is stored per visitor for this item.
## TH9 Farming Base number 5 – Diamond Core Resource Defense Analysis
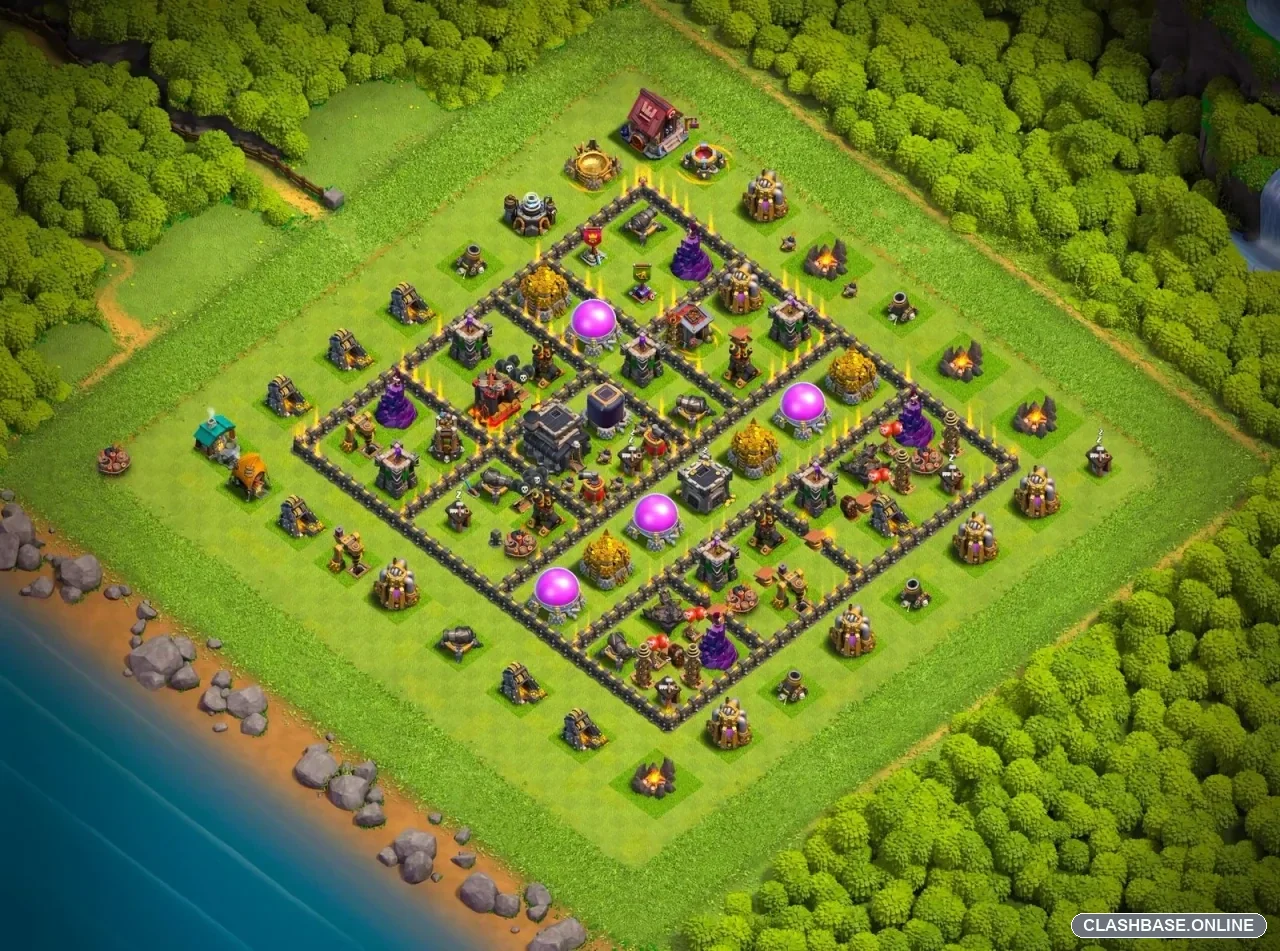
This TH9 farming base uses a tall diamond shape, and that choice seems to do more than just make the village look tidy. The Town Hall is kept almost dead center, while the four Elixir Storages sit around the upper and middle part of the core. Gold Storages are split between the upper interior and the two side sections. That spread is important: an attacker who breaks one compartment does not immediately get a clean run at every valuable storage.
The core is the part I find most convincing. The Town Hall is surrounded by several layers of walls, high-hitpoint storage buildings, and concentrated defenses. There is no obvious one-wall shortcut straight into everything. Even when ground troops reach the middle, they are likely to pause on different targets, which can separate tanks from the troops supporting them.
The layout also makes good use of compartment depth. Instead of one large open box, the village is broken into a series of smaller diamonds and side pockets. Giants, Hog Riders, or other defense-targeting troops may be pulled across the base rather than moving in a perfectly straight line. That extra travel time gives the Archer Towers, Cannons, Wizard Towers, and central defenses more opportunities to fire.
Splash damage looks particularly useful in the upper half. Several Wizard Towers sit close to the main storage zone, so a group of Wizards, Archers, Goblins, or Barbarians that reaches those compartments may take damage while trying to burn through the storages. Mortars cover the wider interior and add pressure when troops bunch together. Storages themselves help here too; because they take a while to destroy, they can act as temporary shields for the defenses behind them.
Air attacks are not given an easy target either. The main anti-air defenses are positioned inside the walls rather than around the perimeter. That appears to force Balloons or Dragons to commit deeper before removing them. Archer Towers around the sides provide extra coverage, although a carefully planned air push from one end of the diamond could still be dangerous if the attacker creates a clean funnel.
The Dark Elixir area is also kept away from the outer edge, which is a sensible farming choice. Reaching it usually means passing through other structures first instead of simply dropping a few troops beside it.
There are weaknesses, of course. The strong symmetry makes the base easier to read after a quick look, and the long top-to-bottom axis may give experienced attackers a fairly obvious direction for a controlled push. Several outside buildings can also be collected cheaply for percentage. On the other hand, those same buildings can waste time or pull poorly placed troops around the edge.
Overall, this is less about trying to make TH9 completely unbreakable and more about making a full loot sweep awkward. The separated storages, layered core, splash coverage, and repeated wall compartments appear well suited to everyday farming, especially against rushed attacks that rely on one quick entry into the center.