 CLASHBASE.ONLINEFarming
About this Town Hall 14 base
Copy this base to Clash of Clans
Tap the button below. Clash of Clans will open so you can place this layout in an available base slot.
Copy base to the gameClash of Clans must be installed on this device.Rate this layout
Share a useful, honest experience. One review is stored per visitor for this item.
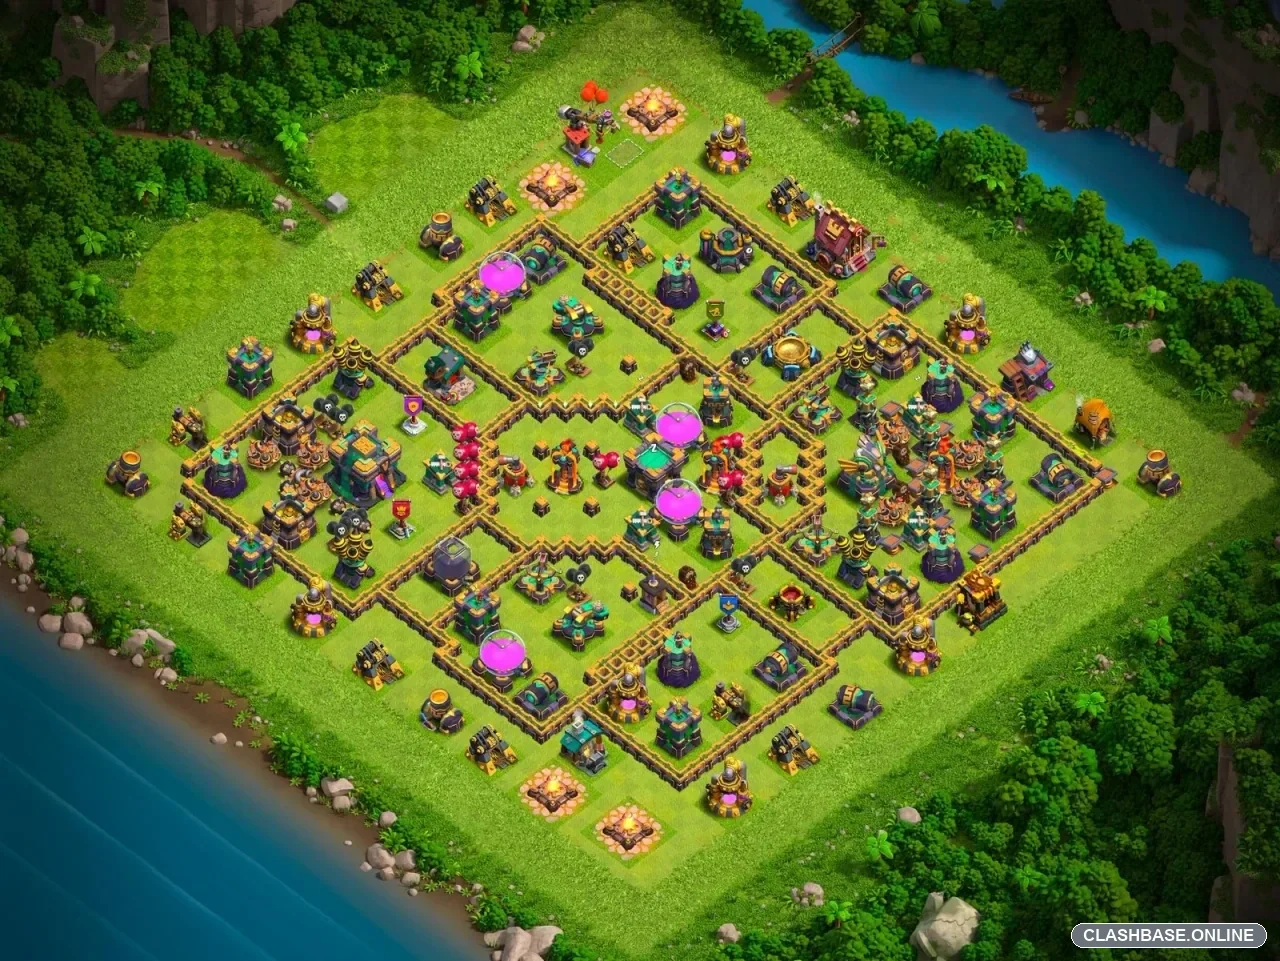
TH14 Farming Base #2: Storage-Led Diamond Defense Built Around Resource Separation
TH14 Farming Layout #2 uses a storage-led diamond structure with the Town Hall protected near the center behind the main resource line. Looking at the actual base first, the layout feels deliberately compact in the middle but less predictable than a simple box base. Valuable storages sit in different sections of the inner structure, while major defenses cover the spaces between them.
For a farming layout, that is a useful idea. The defense does not need to keep every storage untouched. It needs to make sure that losing one valuable pocket does not turn into a quick sweep through the rest of the resources.
The storages help form the defensive core
The Gold and Elixir Storages are distributed through different parts of the central diamond rather than stacked together.
That gives each resource pocket a defensive role of its own. Storages have plenty of hit points, so troops can spend valuable seconds working through one while Inferno Towers, X-Bows, Scattershots, and nearby defenses continue firing.
More importantly, the next storage is not necessarily sitting on the same route.
The Town Hall benefits from this arrangement as well. It remains close to the center, protected by the wider resource network instead of carrying the entire defensive responsibility by itself.
The diamond structure creates pathing friction
The walls form several diagonal sections around the core.
This appears designed to make movement between resource pockets less comfortable. Troops reaching one compartment may find different targets to the left, right, and deeper inside at roughly the same time.
From the defender's point of view, that split can be valuable.
A compact Yeti or Bowler Smash is much more dangerous when tanks, heroes, and support troops remain together. If the diamond pulls parts of the formation into neighboring sections, defensive fire gets more time and shared spell value becomes less efficient.
Queen Charge Hybrid can create different pressure, but the same defensive principle applies: one successful compartment should not automatically unlock the entire center.
Air and Inferno coverage stays separated
The Air Defenses appear to protect crossing lanes rather than only one side, while the Inferno Towers sit far enough apart to act as separate defensive anchors.
That spacing helps preserve pressure across multiple stages of the raid.
Against Dragons or LavaLoon, one air-defense section may begin to fail while another remains active around a different storage pocket. The base therefore avoids depending on one single defensive cluster.
This is important for farming because protecting even one untouched resource section can make a meaningful difference.
The lower-right edge is the main pressure point
The lower-right side appears to be the most exposed section of Layout #2.
The structural concern is a diagonal breakthrough that turns an outer storage lane into shorter access toward the center. If that side collapses too cheaply, the base loses some of the travel distance and pathing disruption built into the diamond.
Defensively, this area needs to consume something—time, troop strength, hero health, abilities, or spells—before the deeper storage network is threatened.