 CLASHBASE.ONLINEFarming
About this Town Hall 6 base
Copy this base to Clash of Clans
Tap the button below. Clash of Clans will open so you can place this layout in an available base slot.
Copy base to the gameClash of Clans must be installed on this device.Rate this layout
Share a useful, honest experience. One review is stored per visitor for this item.
TH6 Farming Base number 9 – Layered Resource Protection and Core Defense
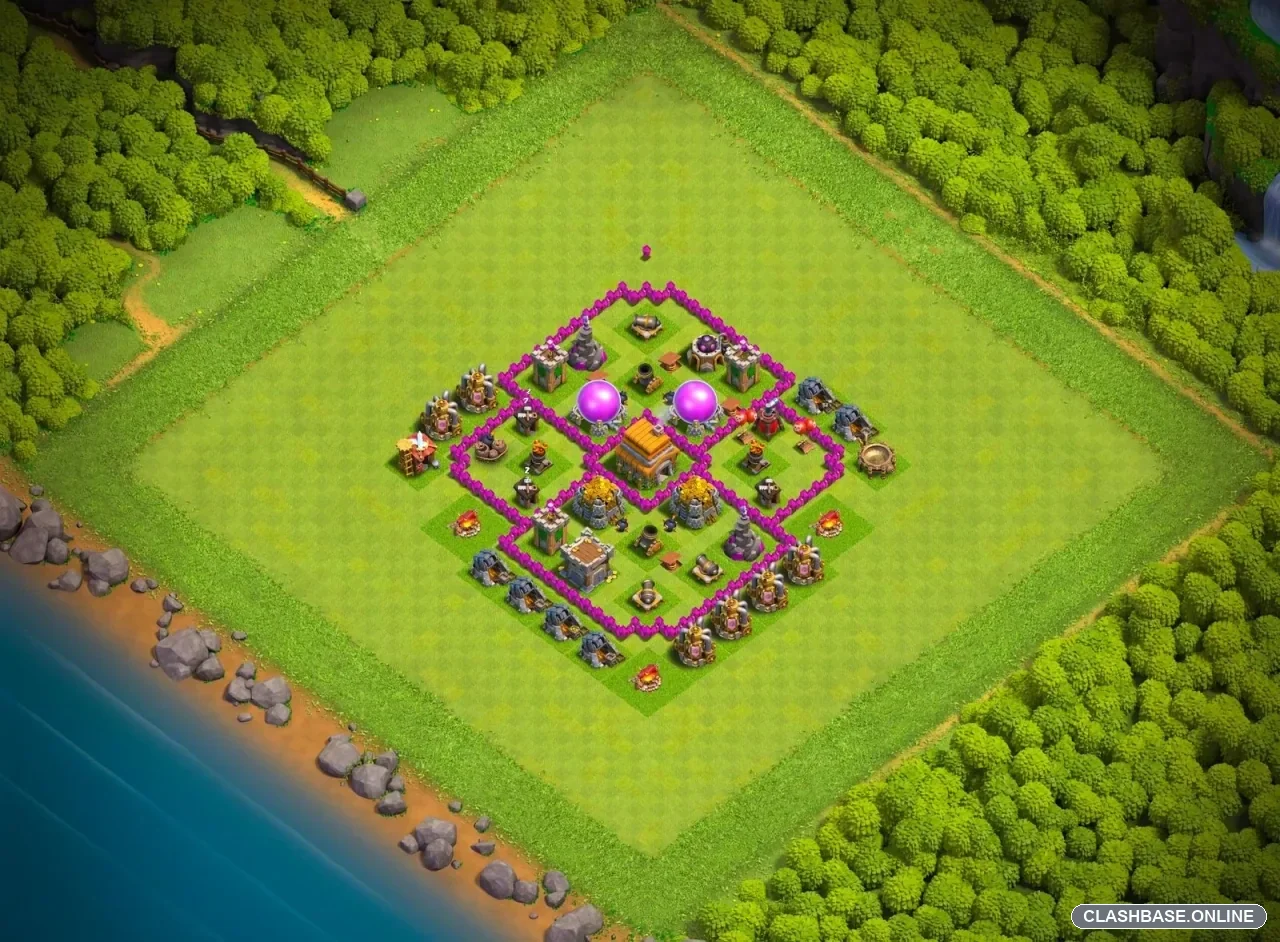
This TH6 farming base keeps things compact, but it does not simply throw every valuable building into one open room. The Town Hall sits inside the main defensive area, with Gold and Elixir Storages protected by the surrounding walls. For a farming layout, that is a sensible starting point: an attacker has to commit troops into the village before reaching most of the worthwhile loot.
The two Elixir Storages are placed in different positions around the inner section rather than directly beside each other. Gold Storages are also mixed into the protected area. That separation may help prevent one successful breach from turning into an immediate full-loot raid.
What I like most here is the wall structure. There is a fairly clear outer diamond and another protected section closer to the center. Breaking the first wall gives the attacker access to part of the base, but not everything. Ground troops still need to turn toward another target, move around a wall, or make a second opening.
That can cause awkward pathing.
A Giant-based farming army coming from the lower-left, for example, might have Giants moving toward the nearest defensive building while Goblins or Wizards stop to attack a storage. If the funnel is rushed, the tanks can get ahead of the support troops. Once that happens, the defenses have a much easier time dealing with the army in smaller groups.
The storages themselves are useful defensively too. They have considerably more hit points than many ordinary buildings, so troops can spend several seconds attacking one target. During that time, Cannons, Archer Towers, Mortars, Wizard Towers, and other nearby defenses are still firing. It is not a complicated trick, but at TH6 those extra seconds can make a noticeable difference.
Splash damage should help against cheaper farming armies as well. Barbarians, Archers, Goblins, and supporting Wizards tend to bunch up once they move through the same wall opening. Mortars and Wizard Towers can punish that behavior, especially if the troops become stuck on a high-health storage.
The outer buildings create a small trade-off. Collectors and other structures around the main walls are easier to destroy, so attackers can pick up some percentage without entering immediately. On the other hand, these buildings can interfere with funneling. Troops placed too widely may walk around the edge instead of heading toward the core.
The compact design does have a weakness. Once a strong army gets control of the inner section, several important targets are relatively close together. A carefully prepared attack may be able to move through the center quickly after the walls are opened.
Still, for normal TH6 farming, the idea works. The layout focuses on keeping the important resources behind multiple layers, slowing troops with high-hitpoint buildings, and creating enough pathing disruption that attackers have to spend more of their army to take everything. It may not stop every raid, but it appears well suited to making a quick loot grab less efficient.