
 CLASHBASE.ONLINE
About this Builder Hall 7 base
Copy this base to Clash of Clans
Tap the button below. Clash of Clans will open so you can place this layout in an available base slot.
Copy base to the gameClash of Clans must be installed on this device.Rate this layout
Share a useful, honest experience. One review is stored per visitor for this item.
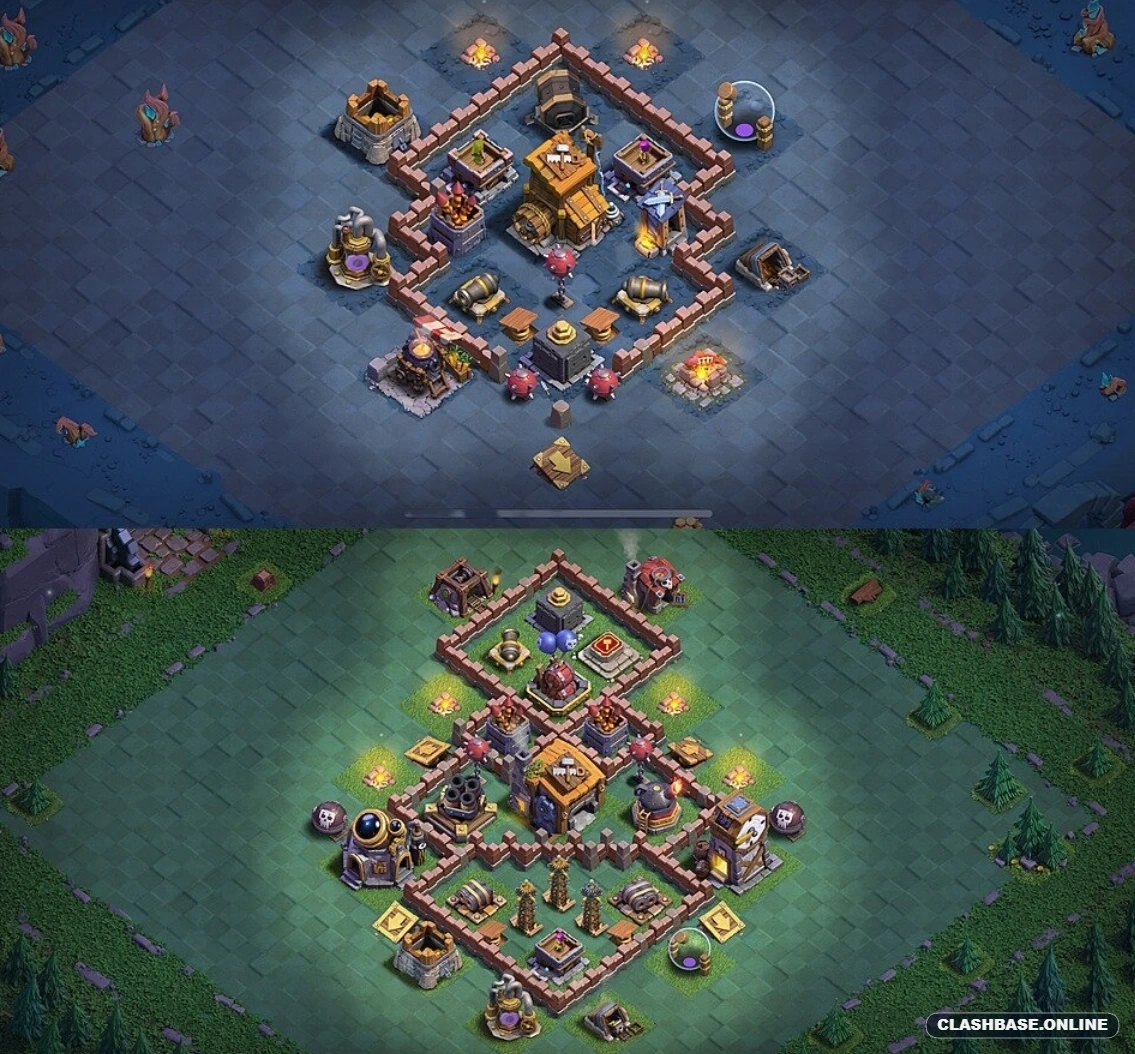
This Builder Hall 7 base number 10 uses symmetry in a way that actually helps the defense rather than simply making the village look neat. The Builder Hall sits almost dead center, surrounded by several small compartments that branch outward like separate defensive pockets. From the image, the idea seems pretty clear: let troops enter, then make them choose between several nearby targets while the middle keeps applying pressure.
The Builder Hall is protected by more than just walls. Several defenses sit immediately around it, so troops reaching the center are unlikely to get a quiet few seconds to work on the Hall. The Multi Mortar is positioned toward the upper section, while close-range and point defenses cover the approaches from the sides and below. If an army arrives at the core already split, those overlapping firing angles can become uncomfortable very quickly.
What I like most here is the four-part compartment structure. The left and right sides each contain their own defensive pockets, and the lower half repeats that idea with additional enclosed sections. Ground troops that normally target defenses may not all choose the same route. Some can peel toward a side tower while others continue inward. It only takes one or two units drifting away for the attack to stop behaving like a single group.
That matters for tank-and-support combinations. A tougher unit moving into the left compartment, for example, may leave weaker troops exposed near the center. The base does not need every defense to deal massive damage on its own. It benefits simply from making the attack arrive in pieces.
The top approach is probably the most direct-looking route, but it has its own catch. The Multi Mortar sits behind the first defensive layer, and the surrounding walls narrow the approach toward the Hall. Troops deployed too broadly can also get distracted by structures outside the main walls. By the time everything reconnects near the middle, the timing of the push may already be off.
There is useful spacing around the perimeter too. The Air Bombs are placed well below the core rather than being tucked beside the Hall. That spreads the defensive value across more than one zone. A flying army going directly for the center might leave that anti-air threat active, while attacking it first adds distance before the Builder Hall is reached.
The lower compartments also create a subtle time problem. Each contains a defense that can pull troops sideways rather than letting them travel straight through. On paper, that may only add a few seconds. In an actual Builder Base attack, though, those extra movements can be the difference between clearing the remaining defenses comfortably and running short on healthy troops.
The main weakness is fairly obvious: the core is compact. If an attacker funnels properly and manages to enter with most of the army still together, several important defenses can be reached in quick succession. The symmetrical shape may also become easier to read after a careful scout.
Even with that trade-off, the defensive concept is solid for BH7. This base relies on troop splitting, repeated target changes, central crossfire and small compartment delays. It is not trying to create one impossible wall. Instead, it makes the attacker manage several small problems at once, and that is where this design is likely to get most of its defensive value.
 CLASHBASE.ONLINE
 CLASHBASE.ONLINE
 CLASHBASE.ONLINE