 CLASHBASE.ONLINEFarming
About this Town Hall 4 base
Copy this base to Clash of Clans
Tap the button below. Clash of Clans will open so you can place this layout in an available base slot.
Copy base to the gameClash of Clans must be installed on this device.Rate this layout
Share a useful, honest experience. One review is stored per visitor for this item.
TH4 Farming Base number 3 – Diamond Core and Split Resource Defense Analysis
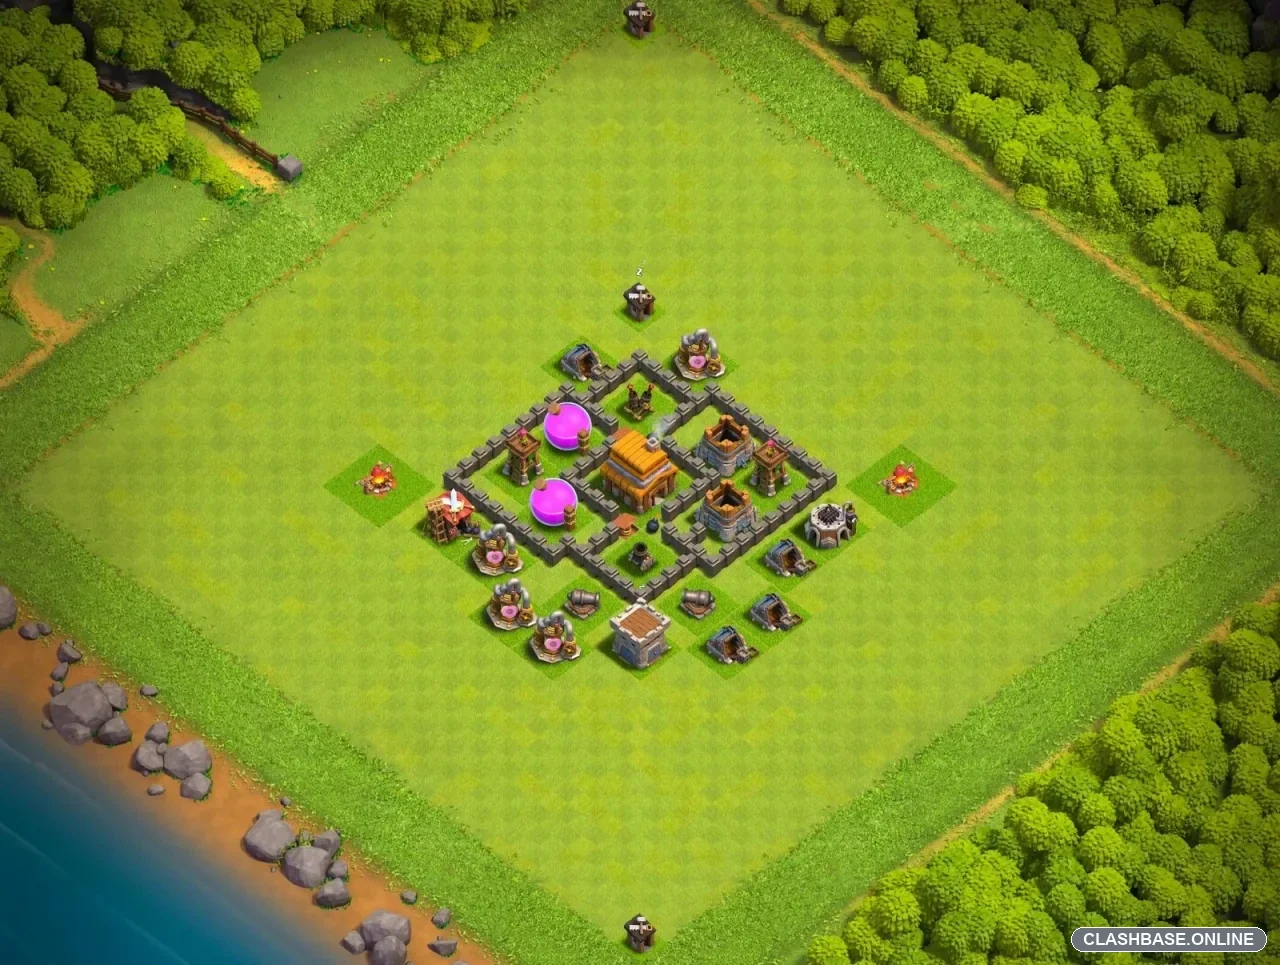
This TH4 farming base uses a simple diamond shape, but there is a sensible defensive idea behind it. The Town Hall sits toward the upper-middle part of the core, while the important resource buildings are placed farther down and protected by the surrounding defenses. Rather than trying to wall every building, the layout spends most of its limited wall space on the part of the village that actually matters.
For a TH4 farming base, that is a reasonable trade-off.
The two Elixir Storages are kept inside the lower half of the defensive structure. They are fairly close, admittedly, so a strong push through the bottom could threaten both during the same attack. Still, they are not sitting directly on the perimeter. An attacker has to cross walls and stay under defensive fire before getting reliable access to them.
What I like more is the way the Town Hall and storages are separated by the internal structure. Reaching the Town Hall does not necessarily mean troops will immediately move onto both Elixir Storages. Giants, for example, may turn toward nearby defenses while Archers or other general-targeting troops choose a different building.
That can make a cheap farming raid lose its shape surprisingly quickly.
The wall design helps with this. The base is not one completely open square. There are smaller sections inside the diamond, which can force ground troops to turn or move around walls instead of taking a perfectly straight route. At TH4, where attackers have relatively few Wall Breakers and limited troop capacity, an inefficient breach can become costly.
Defensive coverage also appears fairly balanced. Cannons and Archer Towers are positioned around different sides of the core, so removing one defense does not instantly make the whole village safe. The Mortar is especially useful against groups of Barbarians and Archers, since those troops often bunch together behind Giants or around a storage.
The storages themselves also buy time. They have much higher hit points than collectors or small utility buildings. If troops stop to destroy one, the nearby defenses get several extra seconds to keep shooting. At low Town Hall levels, that delay is more meaningful than it might sound.
There are some weaknesses. The compact footprint means that once an attacker controls the center, the remaining valuable buildings are fairly close together. The lower resource area may also attract a focused entry from someone specifically hunting Elixir. Outside buildings can be cleared cheaply too, which helps an experienced attacker create a cleaner funnel.
Even with those drawbacks, this looks like a practical TH4 farming setup. Its main strength comes from keeping the valuable resources inside the defensive core, using walls to interrupt troop movement, and forcing attackers to spend more troops before reaching the second storage.
It will not stop every raid, and it does not need to. If a quick farming attack takes some loot but fails to clean out the whole resource area, the layout has already done a useful part of its job.