
 CLASHBASE.ONLINE
About this Builder Hall 10 base
Copy this base to Clash of Clans
Tap the button below. Clash of Clans will open so you can place this layout in an available base slot.
Copy base to the gameClash of Clans must be installed on this device.Rate this layout
Share a useful, honest experience. One review is stored per visitor for this item.
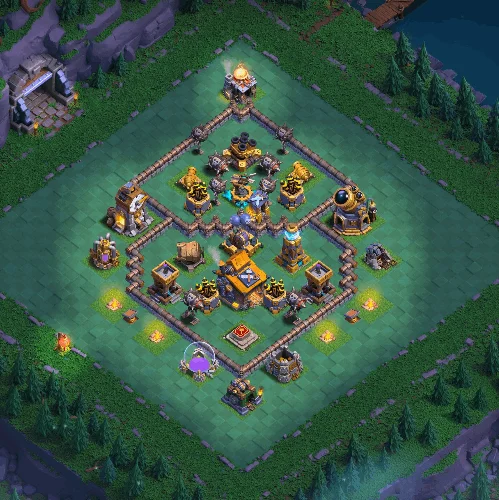
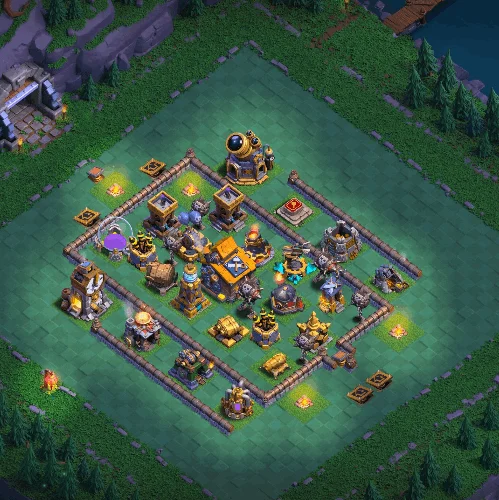
This Builder Hall 10 layout number 09 feels less predictable than a typical compact square base. The Builder Hall sits slightly left of the center rather than being placed at the exact heart of the design, and the surrounding defenses are broken into several small compartments. That combination appears intended to make the attacker choose between chasing the Builder Hall early or dealing with the defensive network around it first.
The Builder Hall has good immediate support, but it is not surrounded by every major defense in one tight cluster. That is important. Even if an attacker manages to reach the Hall relatively early, several dangerous defenses can remain active on the lower and right-hand sides. In other words, taking the Builder Hall does not necessarily mean the difficult part of the stage is over.
The wall structure is probably the most useful defensive feature here. There are small compartments above, below, and beside the Builder Hall, along with a few wall extensions that do not form complete boxes. They may look slightly untidy, but that appears deliberate. Ground troops often respond to the nearest available target, so a Battle Machine or Power P.E.K.K.A. can turn toward a side defense while the rest of the army continues toward the core.
That kind of split is exactly what this base seems designed to encourage.
The Mega Tesla is positioned in the lower central area, where it can remain protected while the attack is dealing with buildings closer to the Builder Hall. Its placement also gives the lower section real defensive weight; entering from that direction means the attacker cannot simply walk through a low-pressure edge.
On the right, the Giant Cannon sits away from the Builder Hall core. I actually like this placement. Because it is separated from the central cluster, attackers focusing too heavily on the Hall may leave it firing for longer than they intended. Against grouped ground troops, that can become particularly uncomfortable.
Another useful detail is the mix of buildings outside the main compartments. Structures on the upper, right, and lower edges can influence the funnel before troops even reach the walls. If the deployment is too wide, one or two units may wander toward those exterior targets, reducing the strength of the main push.
There is still a weakness worth mentioning. The Builder Hall is relatively accessible once the attacker creates the correct entry, and the overall base is not extremely spread out. A patient player who controls the exterior first may be able to keep the army together and reduce much of the intended pathing disruption.
Even so, the defensive concept makes sense. This BH10 layout is less about creating an impenetrable Builder Hall compartment and more about keeping important defenses active from different angles, splitting troop movement, and making cleanup less straightforward. It should be particularly effective against rushed ground attacks where most troops are committed from one direction without a proper funnel. Actual performance will naturally vary with defense levels, trap settings, troop upgrades, and attacker execution.
 CLASHBASE.ONLINE
 CLASHBASE.ONLINE
 CLASHBASE.ONLINE