
 CLASHBASE.ONLINE
About this Builder Hall 7 base
Copy this base to Clash of Clans
Tap the button below. Clash of Clans will open so you can place this layout in an available base slot.
Copy base to the gameClash of Clans must be installed on this device.Rate this layout
Share a useful, honest experience. One review is stored per visitor for this item.
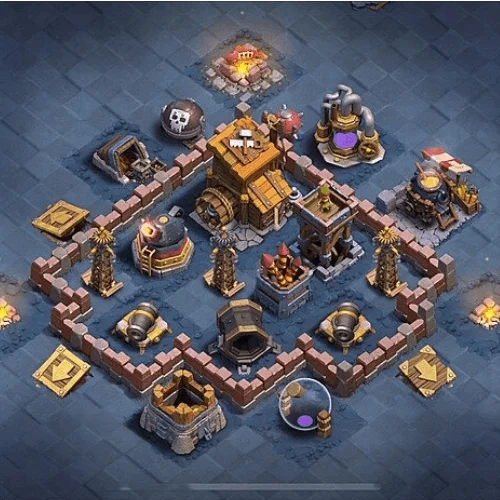
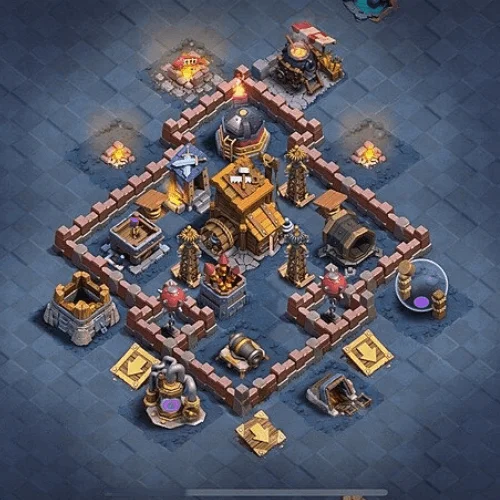
This Builder Hall 7 base number 08 is built around a compact center, but the wall structure is anything but simple. The compartments bend around one another in an uneven pattern, creating several short corridors and side pockets instead of giving troops a clean route across the village. That appears to be the main defensive idea here: make the attacker commit, then let troop targeting create problems on its own.
The Builder Hall sits close to the middle, with the Multi Mortar positioned just above and to the right. That pairing gives the central area a lot of importance. Troops pushing directly for the Hall are likely to remain under repeated fire while they work through nearby defenses, and the surrounding compartments make it difficult for every unit to approach from the same angle.
The upper section is particularly awkward for ground armies. An Archer Tower sits inside its own pocket, while other defenses are placed at different depths around it. A group entering from roughly 11 or 12 o’clock may start together, but the closest targets can quickly pull individual units left, right or deeper toward the core. Once the front line separates, weaker support troops no longer have the same protection.
There is a similar problem on the lower-right side. The walls create a long, staggered route rather than one large open compartment. A defense-targeting troop may move toward the outer cannon while another unit chooses something closer to the Builder Hall. It may only be a few tiles of separation, but that is often enough for the central defenses to concentrate on smaller groups instead of dealing with the whole army at once.
The Multi Mortar is well sheltered for a long-range defense. It is not sitting on an exposed edge where the first few troops can remove it immediately. As long as it survives, grouped units moving through the middle can keep taking chip damage while other defenses finish the job at closer range.
Air coverage is spread out rather than tied to one central spot. The Air Bombs sit toward the upper-left exterior, while other air-targeting defenses remain closer to the core. That creates a choice for flying armies. Starting near the Air Bombs may remove one major threat early, but it also shifts the attack away from the shortest line toward the Builder Hall. Entering elsewhere leaves those Air Bombs active for later.
The outside buildings help with time and targeting too. A few structures sit beyond the walls on several sides, and troops deployed too widely can wander toward them before joining the main fight. It is a small detail, but BH7 defenses often gain value from exactly those short delays.
There is a weakness to all this compartment density. If an attacker identifies the right entry and gets a healthy force into the center, several important defenses become reachable fairly quickly. A disciplined funnel can also reduce the troop-splitting effect that the walls are trying to create.
Still, the defense has a clear purpose. Its strength comes from uneven compartments, central damage coverage, delayed troop movement and frequent target changes. Rather than relying on one surprise, this BH7 base tries to make the attack gradually lose structure — and when that happens, the core becomes much harder to clear efficiently.
 CLASHBASE.ONLINE
 CLASHBASE.ONLINE
 CLASHBASE.ONLINE