
 CLASHBASE.ONLINE
About this Builder Hall 9 base
Copy this base to Clash of Clans
Tap the button below. Clash of Clans will open so you can place this layout in an available base slot.
Copy base to the gameClash of Clans must be installed on this device.Rate this layout
Share a useful, honest experience. One review is stored per visitor for this item.
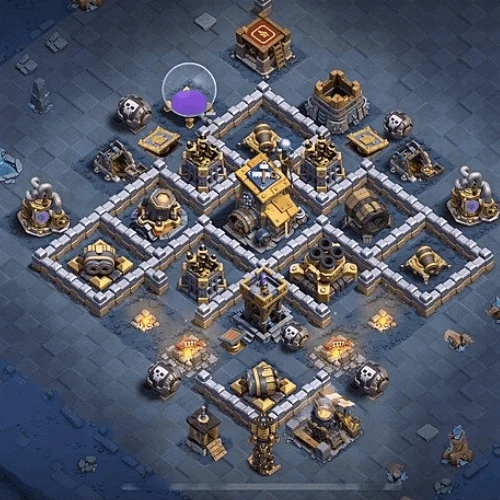
What gives this BH9 number 08 design its character is the way the walls break the village into uneven fighting spaces. The Builder Hall is held near the middle, but the surrounding defenses are not arranged in a perfectly balanced ring. Some sit deep inside the core, others are pushed toward the edges, and that uneven distribution can make choosing an entry more difficult than expected.
The upper-left approach is especially interesting. A Giant Cannon sits away from the busiest part of the base, which means it can survive even when attackers commit heavily toward the center. Ground troops moving across that side may naturally line up during their approach, giving the cannon useful opportunities to punish a poorly organized push.
Moving directly through the middle is not necessarily comfortable either.
Several defenses cover roughly the same central space, creating a pocket where incoming troops can be hit from more than one direction. Walls divide those targets just enough to interfere with movement. A Power P.E.K.K.A. might break toward one defense while the Battle Machine chooses something closer on another side. That separation may only last a few seconds, but a few seconds under concentrated fire can matter.
The lower-left enclosure adds another wrinkle. It contains targets that are close enough to attract ground units but far enough from the central objective to pull them off course. An attacker who opens that section without preparing the funnel carefully could spend too much time clearing buildings that were never part of the original plan.
On the opposite side, several structures sit beyond or beside the main wall line. They look easy to collect for percentage, yet deploying too many troops there carries a cost. Those units may stay outside longer than expected while the central group starts fighting without them.
I also like the short wall pieces at the top and right edges. They do not protect a major building by themselves, which might make them seem unnecessary. Their value is more subtle: they shape the available walking space and can make the safest-looking entry angle slightly misleading.
Air attacks change the picture somewhat. Flying troops are not bothered by the compartment geometry, so the walls lose much of their influence. In that matchup, defensive spacing and overlapping coverage become more important. A careful air player may therefore find the base easier to read than someone relying on a heavy ground push.
There is another compromise worth noting. Once the center is fully breached, several valuable defenses sit reasonably close together. A healthy attacking force with abilities still available could gain momentum quickly. The design is likely to perform best when it creates damage, hesitation, or troop separation before that point.
The defensive idea here is less about making one area impossible to enter and more about messing with the attacker's timing. Offset defenses, separated compartments, side targets, and crossfire make careless deployment risky. For BH9, that gives the base a useful balance between core protection and pathing disruption without depending on a single defensive trick.
 CLASHBASE.ONLINE
 CLASHBASE.ONLINE
 CLASHBASE.ONLINE