
 CLASHBASE.ONLINE
About this Builder Hall 9 base
Copy this base to Clash of Clans
Tap the button below. Clash of Clans will open so you can place this layout in an available base slot.
Copy base to the gameClash of Clans must be installed on this device.Rate this layout
Share a useful, honest experience. One review is stored per visitor for this item.
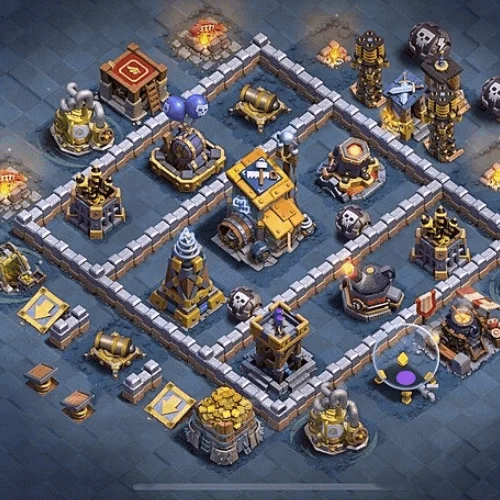
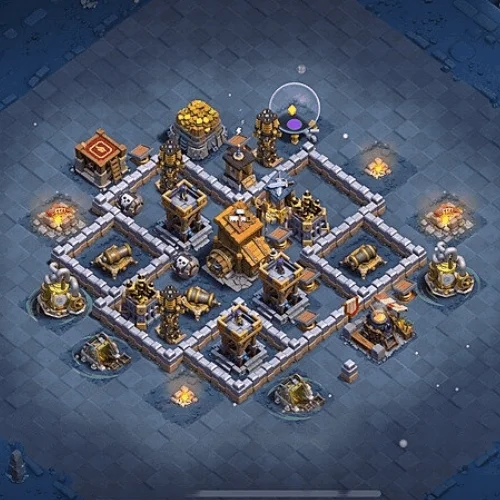
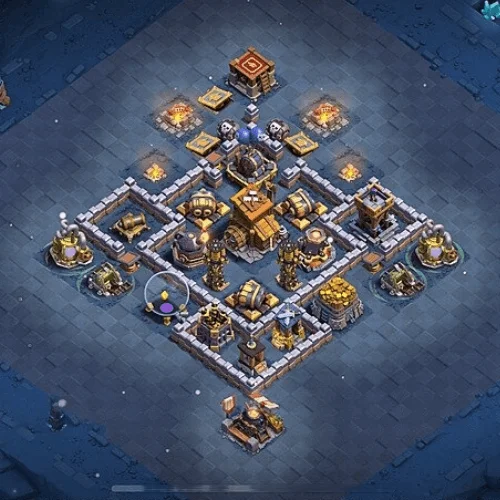
The clever part of this BH9 number 10 setup is not one oversized defensive core. It is the way several smaller sections overlap and create awkward choices as troops move inward. Important buildings are distributed across a roughly diamond-shaped formation, with the main objective near the middle and heavier defensive pieces stationed far enough apart that one successful breach does not remove everything at once.
Ground pathing could become messy here quite quickly.
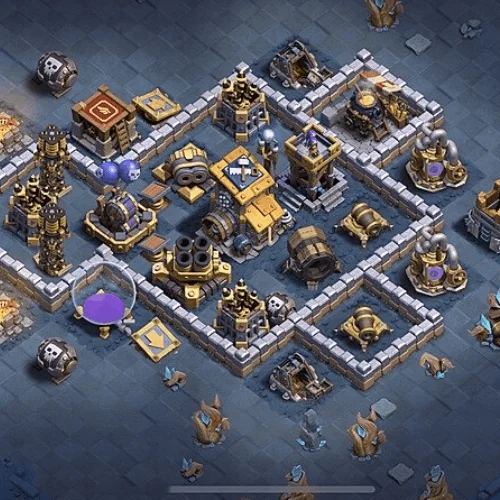
The left-hand compartments are narrow, with multiple targets competing for attention. If a Battle Machine enters slightly off the planned line, it may turn toward a nearby defense while the rest of the army keeps moving through another opening. That sort of separation is exactly what a compact BH9 defense wants: not necessarily stopping troops at the wall, but making them arrive at the important area at different times.
There is similar pressure from the opposite side. The large cannon defense positioned toward the upper-right sits outside the deepest central pocket, allowing it to remain relevant even when fighting has already moved inward. Sending a heavy ground group through its side could expose several units to sustained damage before they are in position to remove the central targets.
The middle is packed without feeling completely overcrowded. Several defensive structures can cover neighboring compartments, and short wall breaks keep attackers from moving freely from one target to the next. It creates something close to a series of small fights rather than one clean engagement. A troop group that wins the first section may still have to turn, walk, and retarget before dealing with the next threat.
That delay matters.
Another useful touch is the number of buildings placed just beyond the main wall network. They are easy enough to underestimate. An attacker may collect them for early percentage, but sending too many units outside weakens the force entering the defended area. Leave them untouched, on the other hand, and cleanup becomes longer later in the attack.
The lower portion adds yet another route, though it is not necessarily a free one. Troops coming through there can be drawn toward side structures before reaching the busiest section. Defenses on either flank may stay active while that happens, creating crossfire rather than a simple front-to-back attack.
There are limits to the design. Most of its pathing tricks are aimed at ground movement, so flying troops naturally ignore much of the wall geometry. And if a skilled attacker clears the exterior carefully before committing, the center becomes easier to approach as one organized group.
Still, the defensive logic is strong. The base tries to win through uneven entry angles, delayed targeting, separated defensive anchors, and multiple small pressure zones rather than depending on one trap or one protected building. Poor funneling is likely to be punished much more heavily than patient preparation, which gives this BH9 setup a practical defensive identity without pretending that any base is unbeatable.
 CLASHBASE.ONLINE
 CLASHBASE.ONLINE
 CLASHBASE.ONLINE